Indwelling Pleural Catheter (PleurX™)
What is the pleura?
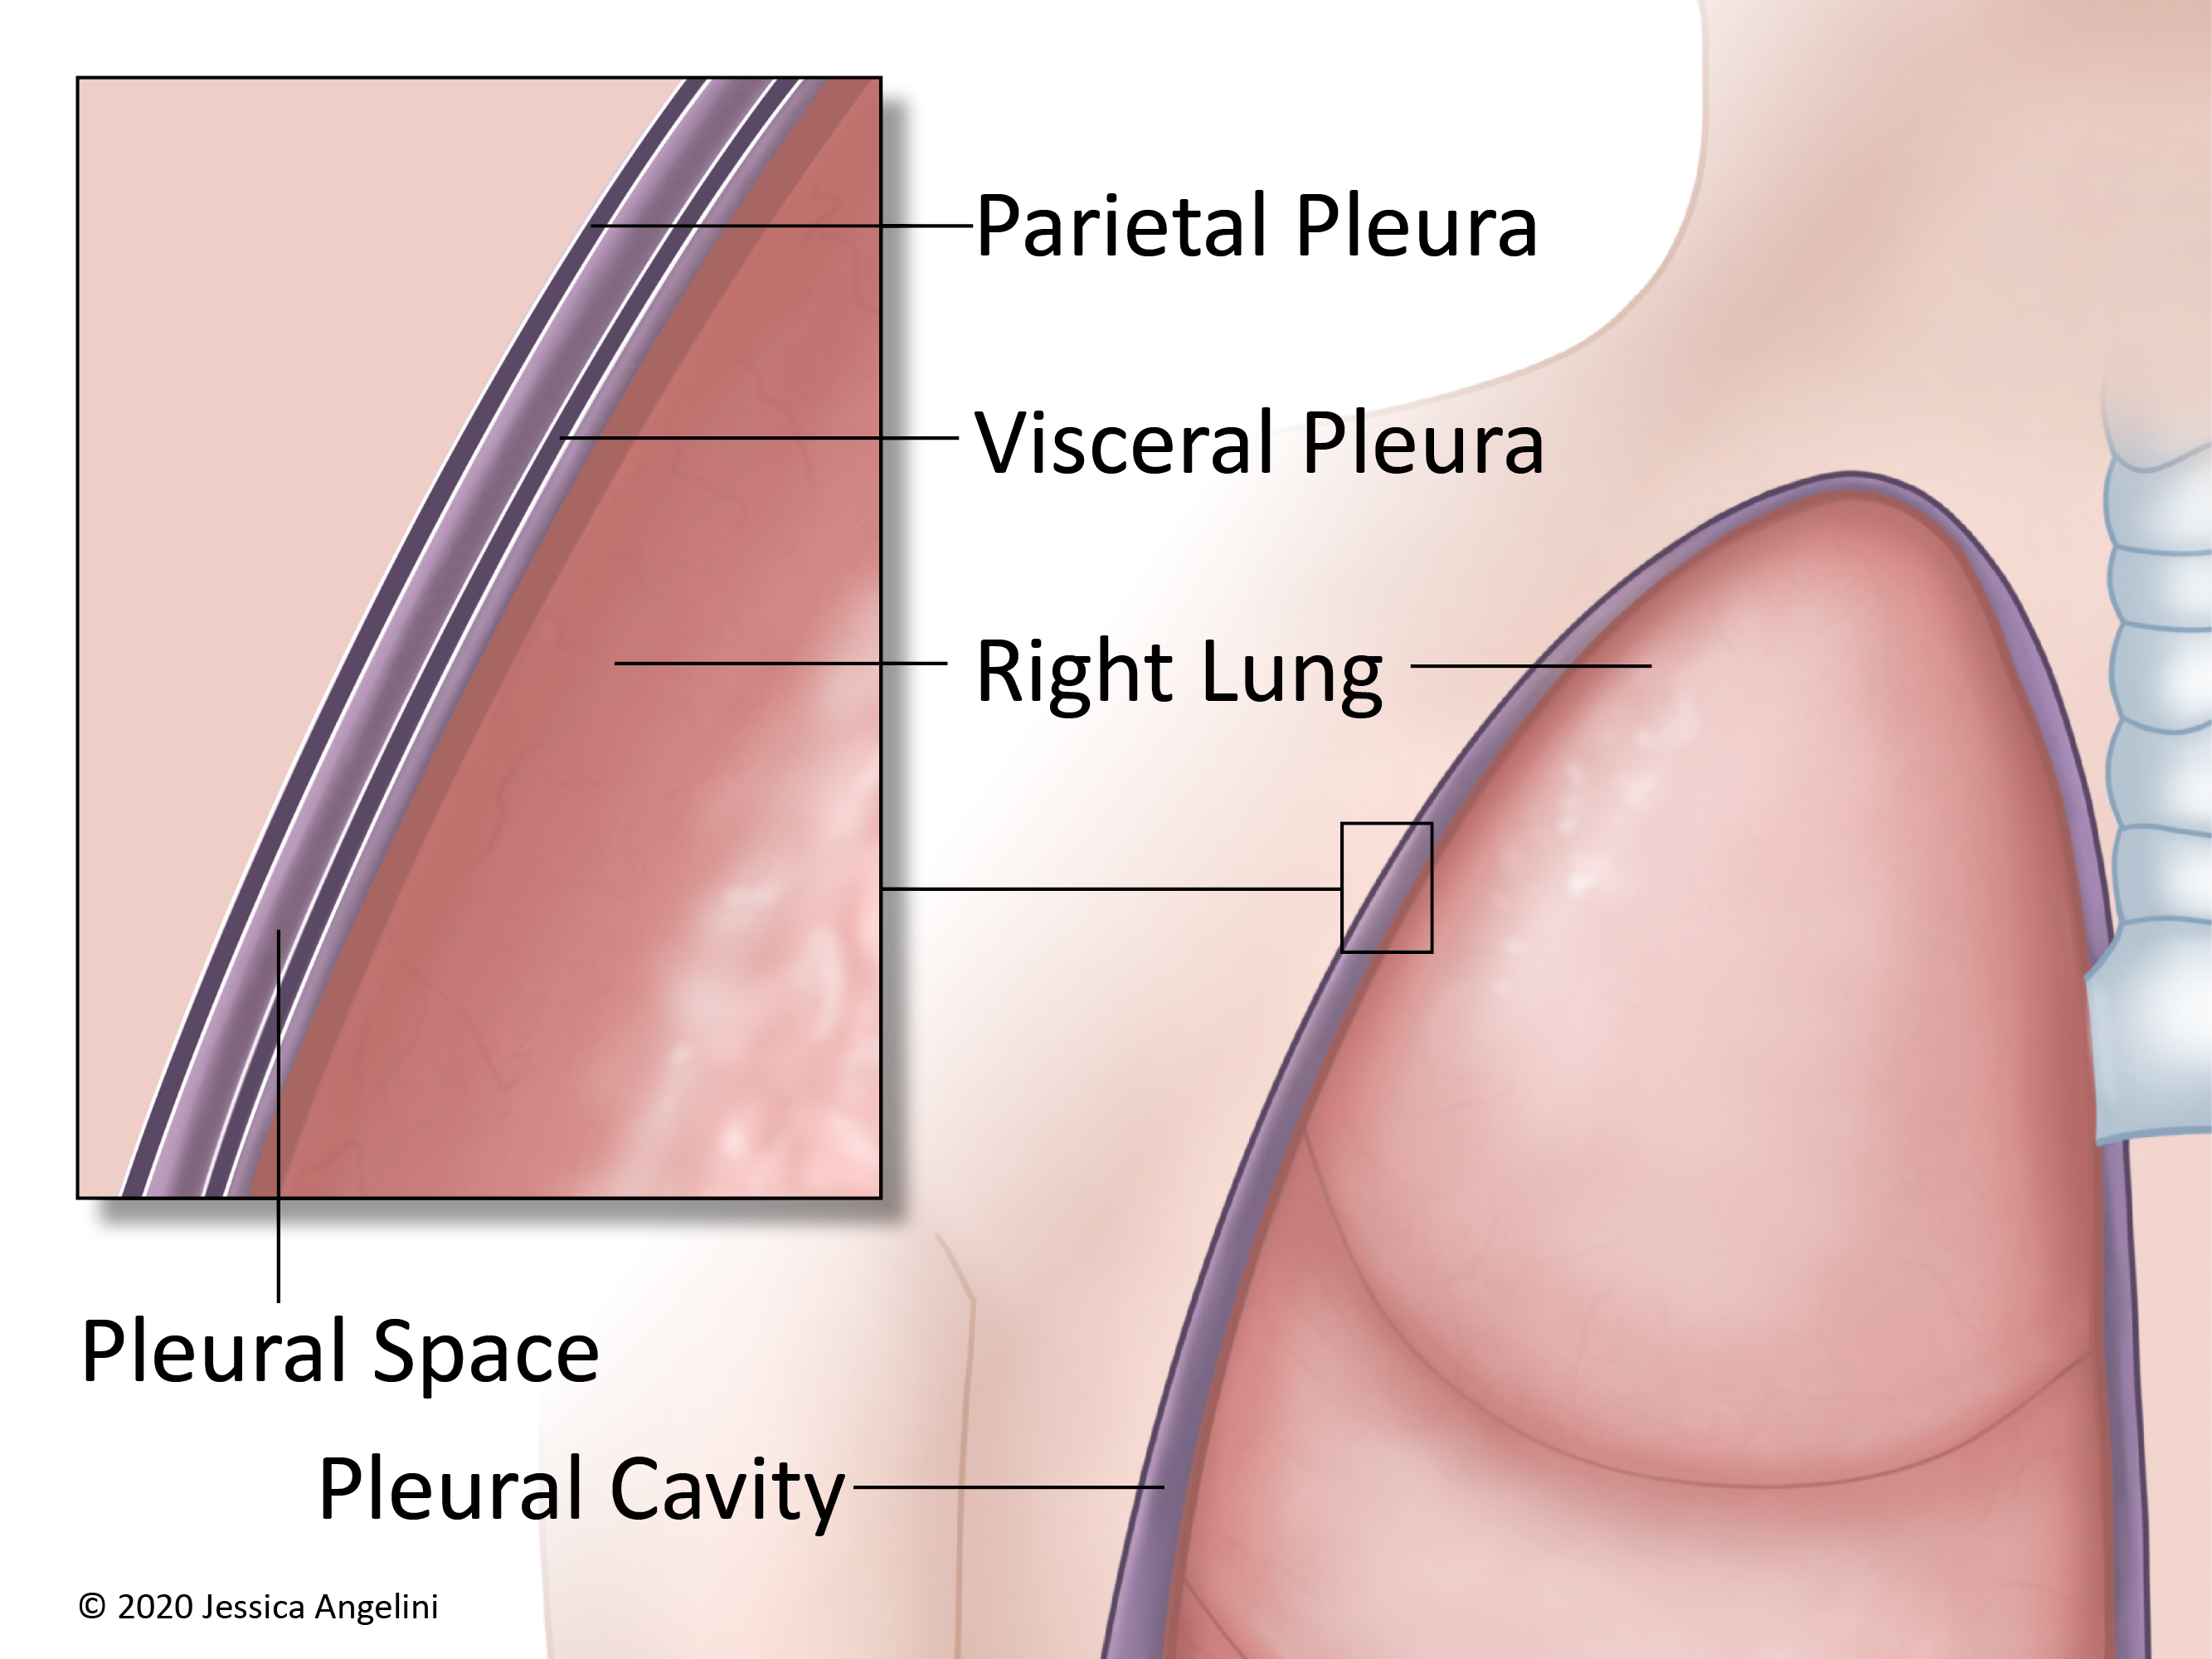
The pleura (pleurae when talking about both sides of the body) is a thin, slippery layer of tissue that helps protect the lungs. There are 2 layers of pleurae:
- Visceral Layer: Thin, slippery layer that covers the surface of the lungs.
- Parietal Layer: Outer layer that lines the chest wall and diaphragm (muscle that helps with breathing).
The pleurae cushion the lungs and help them move freely as you breathe. In between the pleura is an area called the pleural space, or pleural cavity. There is a small amount of fluid (called pleural fluid) in this space. There are normally 10-20 milliliters (about 1 tablespoon) of fluid in this space.
What is a pleural effusion?
Sometimes, too much fluid can build up in the pleural space. This extra fluid is called a pleural effusion. A pleural effusion can be caused by a few things, such as cancer (malignancy), congestive heart failure (CHF), and infection. About 40% of pleural effusions are caused by cancer. Cancers of the lung and breast, lymphoma, and leukemia are the cancers most often linked with pleural effusion. Pleural effusions can happen once, or they may keep happening (recurrent).
The pleural effusion can affect one or both lungs. The extra fluid makes it hard for your lungs to work as they should. Signs and symptoms of pleural effusion are:
- Shortness of breath.
- Cough.
- Chest pain or discomfort.
- Weight loss.
- Fatigue.
What is an indwelling pleural catheter (PleurX™)?
If the fluid in your pleural space keeps coming back (recurrent pleural effusion), your healthcare provider may want to place an indwelling pleural catheter, often called a PleurX™. The PleurX™ drains the extra fluid from the pleural cavity. It can help ease the symptoms you are having.
How is the indwelling pleural catheter (PleurX™) placed?
The pleural catheter is a flexible tube that is inserted through an incision (cut) in your chest and placed in the pleural cavity. The catheter sits in the pleural cavity and has many holes in it to collect the extra fluid. The rest of the

PleurX™ catheter
catheter sits outside of your body and is coiled up and covered by a bandage when not in use.
The PleurX™ catheter is usually placed as an outpatient procedure, meaning you can go home afterward. The procedure usually takes 45-90 minutes. You will have an IV placed and be given medication to make you sleepy. During the procedure:
- Your provider will make 2 small incisions into your skin. One will be into the pleural space where the fluid is. The other will be a few inches below that.
- The provider will make a tunnel, or small pathway under the skin, from one incision to the other.
- The flexible PleurX™ catheter will be put into the pleural cavity. Your provider will then pass the catheter through the tunnel. The catheter will exit your skin from the lower incision.
- Often, the end of the catheter will be capped. Sometimes, a drainage bag will be placed. Your provider will tell you if you have a cap or a drainage bag.
What should I expect after the procedure?
If you are going home after the procedure, you will need to have someone drive you home. Your provider will tell you when you can go back to normal activity and when to shower. You will probably have a visiting nurse come to your house at first. Call your provider if:
- You have increasing pain.
- You have a hard time breathing/it hurts to breathe.
- You have a fever or chills (your provider will tell you at what temperature you should call).
- You see or feel that your bandage is soaked with drainage.
- The area around your incisions is red or warm.
- The fluid that is draining is cloudy or smells bad.
- The catheter comes out.
- The catheter tube is damaged or cut (you may be given an emergency clamp in case this happens. This is used to clamp the tube or pinch it tightly so that fluid doesn’t come out).
How do I care for my indwelling pleural catheter (PleurX™)?
Your healthcare team and the visiting nurse will teach you how to care for your PleurX™ catheter and incisions. They will also teach you how and when to drain the fluid. Once you are comfortable, you will be able to change your dressing, check that your catheter is working, and drain the fluid on your own or with the help of a caregiver. In general:
To change your dressing:
Change your dressing at least once a week, or as directed by your provider. Change it earlier if it is wet, soiled, or has come loose.
- Wash your hands.
- Hold the part of the catheter that is outside of the body to keep it in place.
- Remove the old dressing and throw it out.
- Wash your hands again.
- Clean around the site gently with soap and water on a gauze pad.
- Place the new dressing as you were taught by your care team.
- Wash your hands.
To drain the pleural fluid (with a capped catheter):
Most often, you will need to drain the fluid from your PleurX™ every day, or as directed by your provider. If you have pain when you empty the fluid, take prescribed pain medication about 30 minutes before you drain the fluid. Your provider will tell you how much fluid to drain and what it should look like. Keep a log of when you drain, how much fluid you drained, and what the fluid looked like. Never drain more than 1,000 milliliters in one day. Most times, the PleurX™ catheter is capped and a vacuum bottle will be used to empty the fluid.
- Wash your hands.
- Set up a clean area to open your supplies.
- Clamp the rolling clamp on your catheter to close it.
- Wash your hands again.
- Remove the old cap on the catheter and throw it out, as taught by your care team.
- Hold the catheter with one hand and clean the end of it with an alcohol swab with the other hand.
- The vacuum bottle will have a short drainage line on it. Insert this drainage line into the cleaned end of the PleurX™ catheter.
- As taught by your care team, push the white plunger into the bottle top. Undo the clamp on your PleurX™ catheter line.
- The fluid will drain by itself, as it is sucked into the vacuum bottle. You can slow down the flow by rolling the clamp on your catheter.
- Drain the amount of fluid you have been told by your provider. The bottles are marked on the side for you to keep track of.
- Once you are done draining, clamp the roller closed on your catheter.
- Remove the drainage line that is connected to the bottle.
- Wash your hands.
- Clean the end of the catheter again with an alcohol swab.
- Place a new cap on the end of your catheter.
*If you have a drainage bag instead of a capped catheter, your provider will tell you how and when to empty this bag.
Your care team will tell you how to throw out the fluid that you drain, but most often you can flush it down the toilet. If you have problems with draining the fluid or if the fluid doesn’t come out, call your provider for instructions.